Dryer Vent Back Pressure: Causes, Measurement & Fixes (Washington State)
Updated: August 2025
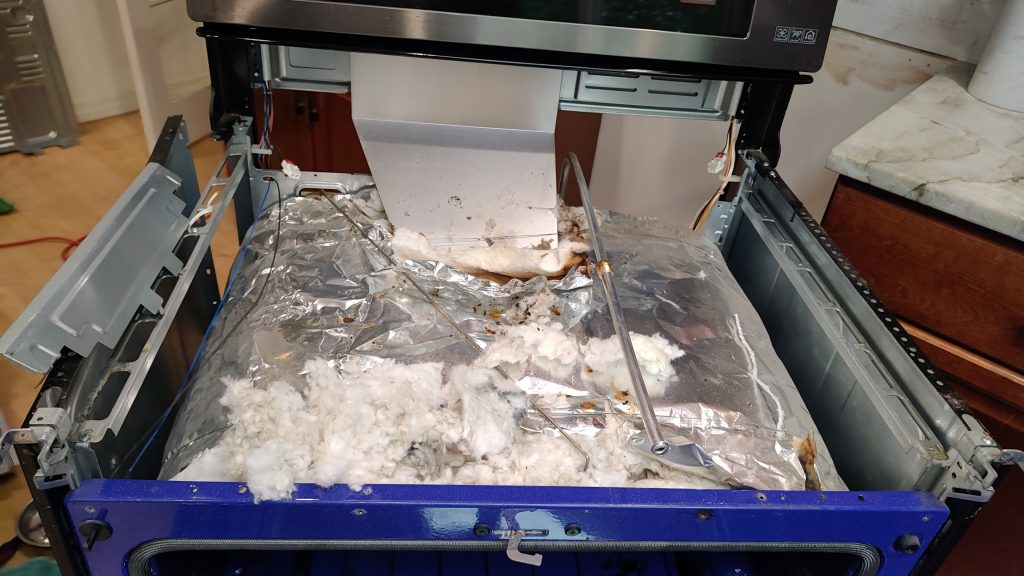
As we continue our work across Washington homes, there’s a common dryer problem that deserves a precise, safety-first check: back pressure in the dryer vent. Excessive back pressure lengthens dry times and accelerates dangerous lint buildup — a real fire risk. Below are the causes, the correct way to measure it, and practical fixes. For a clear visual walk-through of how this works, see this video explanation.
Causes of Back Pressure
- Improper installation. Runs that are too long or have too many elbows increase resistance.
- Clogs. Lint, dust, and debris restrict airflow.
- Wrong diameter/material. Undersized or unsuitable duct adds resistance.
- Duct type. Smooth rigid metal duct is good; “soft” accordion-style flex (like a telephone cord) is bad — its ridges and sagging raise static pressure and trap lint.
What Is Static Pressure (the core idea)
Static pressure is the air pressure inside the duct that resists airflow. We measure it relative to atmospheric pressure — the exact parameter dryer manufacturers specify. Units are inches of water column (in. w.c.; sometimes written iwc/iwg. If you see wci in my notes, it’s the same thing).
- Typical “normal”: ~0.20 in. w.c.
- Manufacturer maximum: up to ~0.60 in. w.c.
When we talk about “back pressure,” we mean elevated static pressure that the dryer’s blower has to push against.
Why I measure static pressure (not hand/tissue/anemometer)
- Manufacturer-aligned. Limits are in in. w.c., not in “hand feel” or airspeed.
- Objective & repeatable. Accuracy to ±0.01 in. w.c. lets us verify improvements after cleaning or shortening a run.
- Finds hidden issues. A stiff roof cap damper, a crimped section, or a partial blockage will show up in static pressure even if a local “hand test” feels OK.
- Safe & quick. No need to disassemble the roof cap or open long sections of duct.
Why not the hand/tissue test? It’s subjective and local — no number to compare with specs. Why not an anemometer? Airspeed is a dynamic value. It’s related to resistance but not equal to static pressure and doesn’t map cleanly to factory limits. A tight restriction can create a “fast jet” while the system as a whole is still critically restrictive.
The Instrument I Use
I use a differential pressure gauge (analog Magnehelic or a digital equivalent) with a range of ~0–1.0 in. w.c. and 0.01 in. w.c. resolution. Accessories:
- Static pressure probe/tap (side holes, positioned perpendicular to flow to filter out dynamic pressure)
- Small flexible tubing
- Aluminum foil tape to seal the test hole afterward (not cloth “duct tape”)


Smooth vs. Flexible Ducts (Quick Tip)
- Smooth rigid metal duct = good. Minimal internal friction, less lint accumulation, lower static pressure.
- Accordion-style flex = bad. Ridges, sags, and stretching act like speed bumps, boost resistance, and trap lint. Avoid for long runs or concealed sections.
How to Measure (Step-by-Step)
- Prep. Clean the lint screen. Make sure the transition hose isn’t crushed.
- Test port. Drill a ~1/8″ (≈3 mm) hole in the transition section 6–12″ (15–30 cm) from the dryer outlet, or use a service tee if present.
- Probe. Insert the static probe perpendicular to airflow.
- Run. Start the dryer on High/Normal and let it stabilize for ~60 seconds.
- Read. Around 0.20 in. w.c. is typical; ~0.60 in. w.c. or higher is critical.
- Seal. Remove the probe and seal the hole with foil tape (not cloth duct tape).

Reading & Interpretation (Quick)
Manufacturers generally advise a maximum of about 0.60 in. w.c.; a healthy system is near 0.20 in. w.c.. To know the real number, you need a pressure gauge. I verify dryer vent systems by static pressure measurement with 0.01 in. w.c. accuracy to keep performance optimal and reduce fire risk.

How to Fix Elevated Back Pressure
- Clean the run. Use a proper cleaning kit or schedule a professional cleaning.
- Shorten & simplify. Reduce total length and the number of elbows.
- Upgrade ducting. Replace undersized or flexible accordion duct with smooth rigid metal of the correct diameter.
- Check installation. Remove kinks/crimps, verify damper action, and ensure proper clearances.
FAQ
1) Can back pressure cause a fire?
Yes. Elevated back pressure accelerates lint buildup, and lint is highly flammable.
2) How often should I check the vent?
At least once a year, and any time work is done on the venting.
3) What are the signs of high back pressure?
Longer dry times, clothes coming out hotter than usual, and a faint burning/dusty smell during operation.
4) Can I clean it myself?
You can, but the safest and most effective approach is a professional cleaning with static pressure measured before and after.